Click the icon on the left for the Full Menu.
 OR
OR 
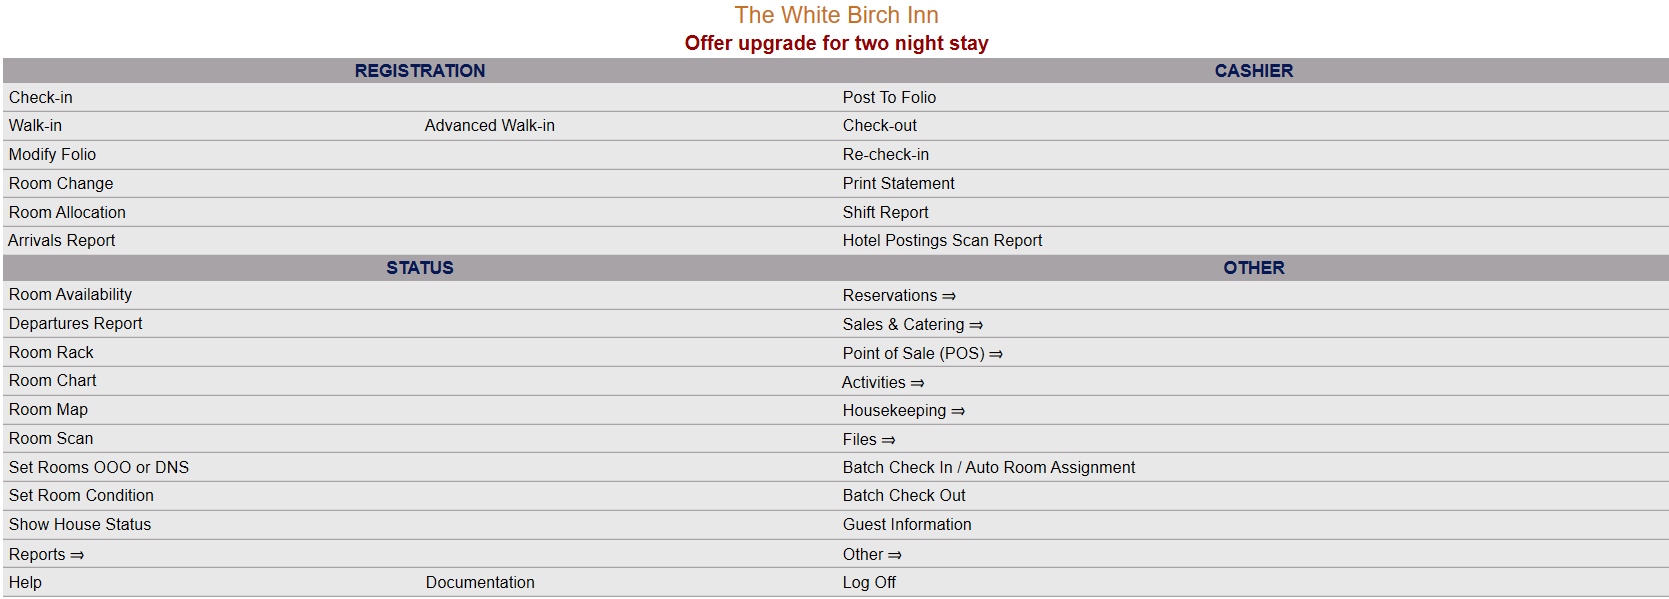
This will display the Full menu in a tabular form, with four sections, Registration, Status, Cashier and Other.
 OR
OR 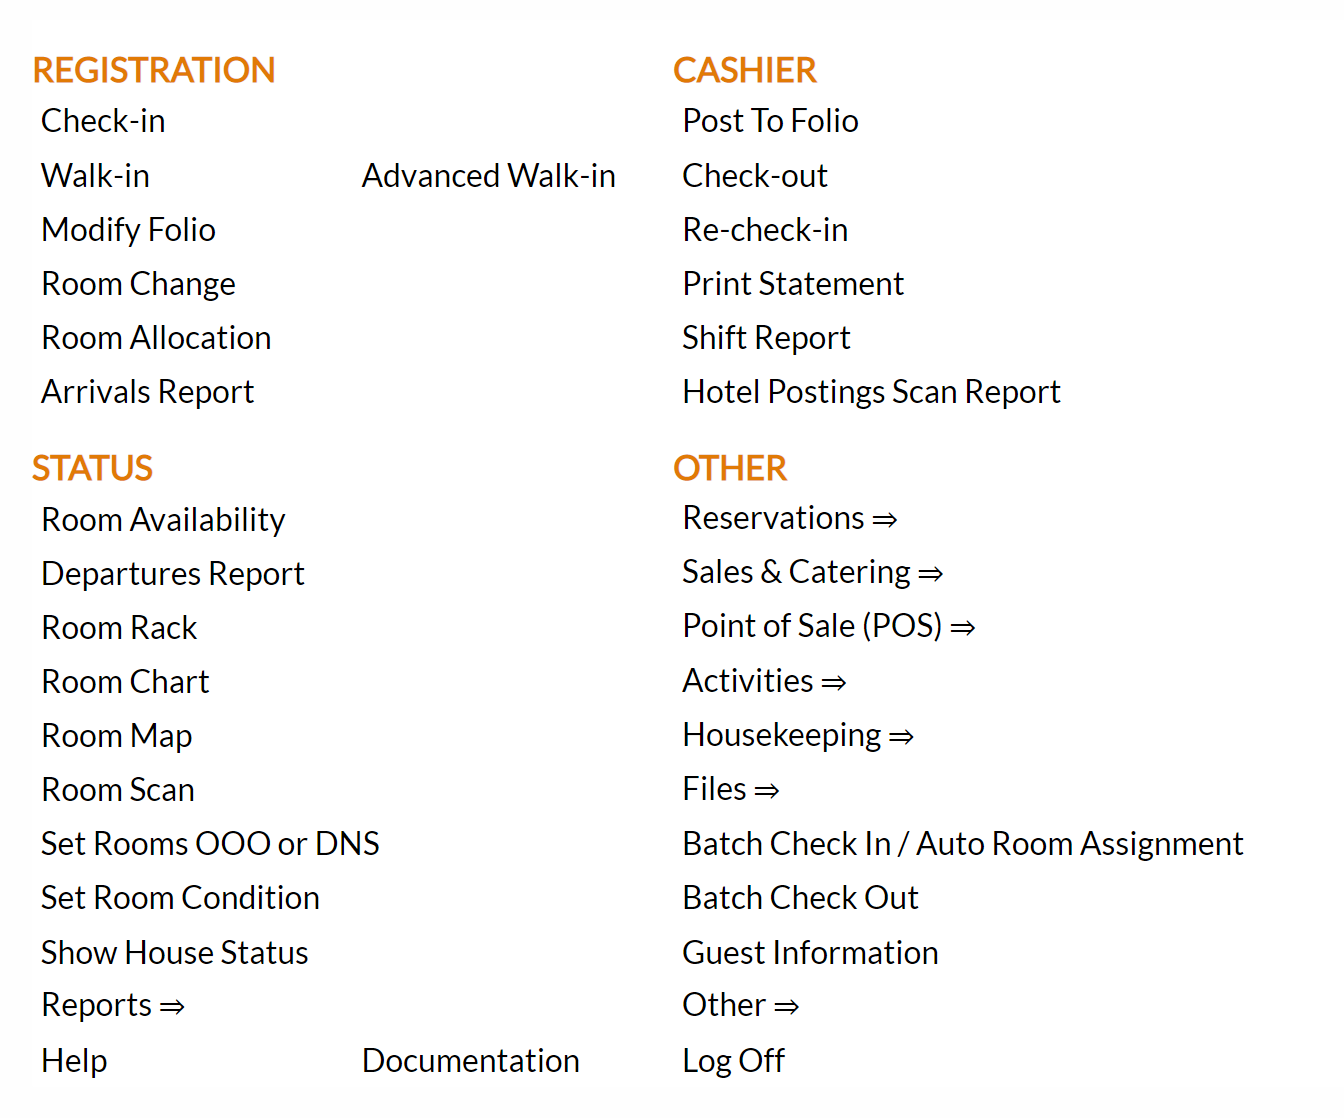
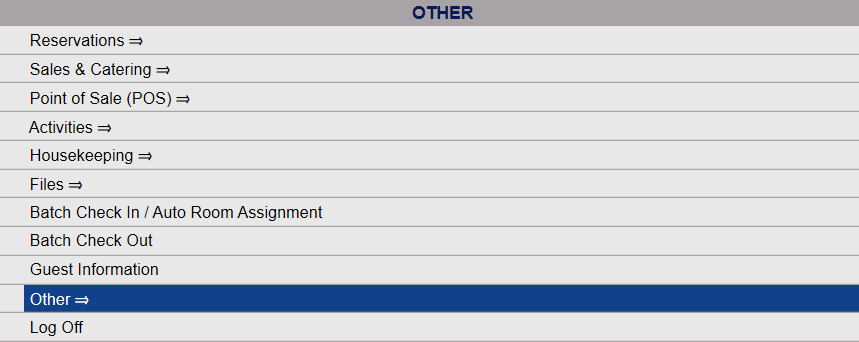
Select Other from the Other section.
 OR
OR 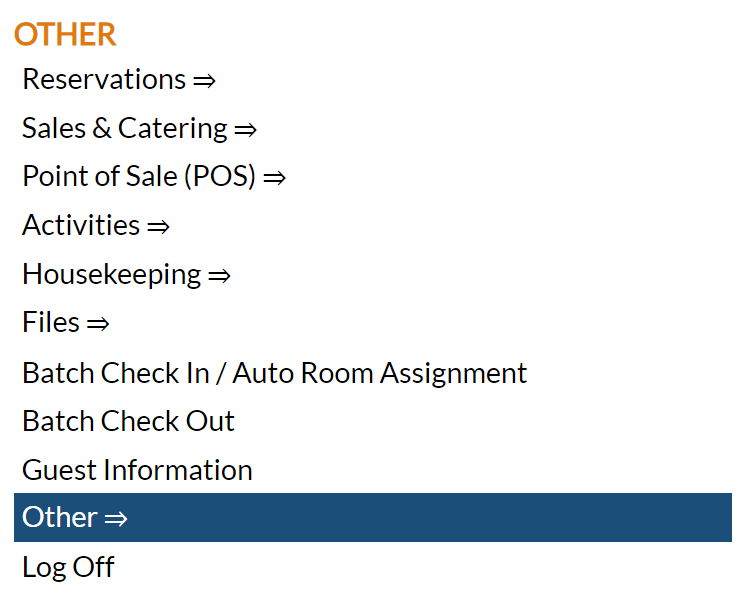
This will take you to the Other Front Desk Tasks Menu, which has four sections, Other List 1, Other List 2, Documents and Web.
 OR
OR 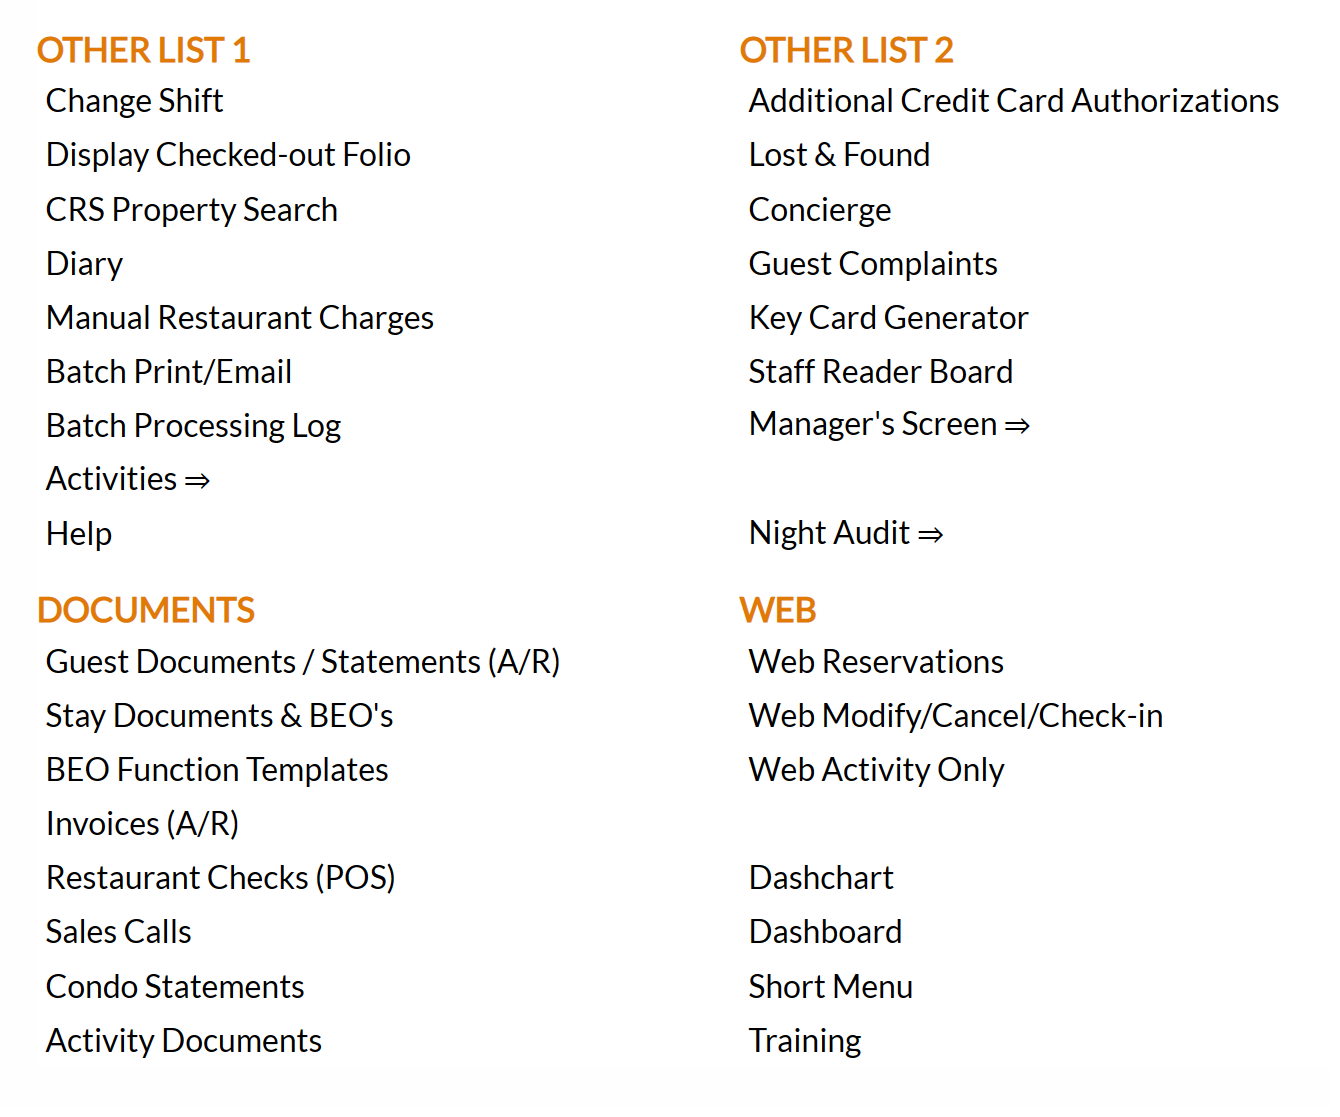
Select Manager's Screen to be taken to the Manager's Command screen.
 OR
OR 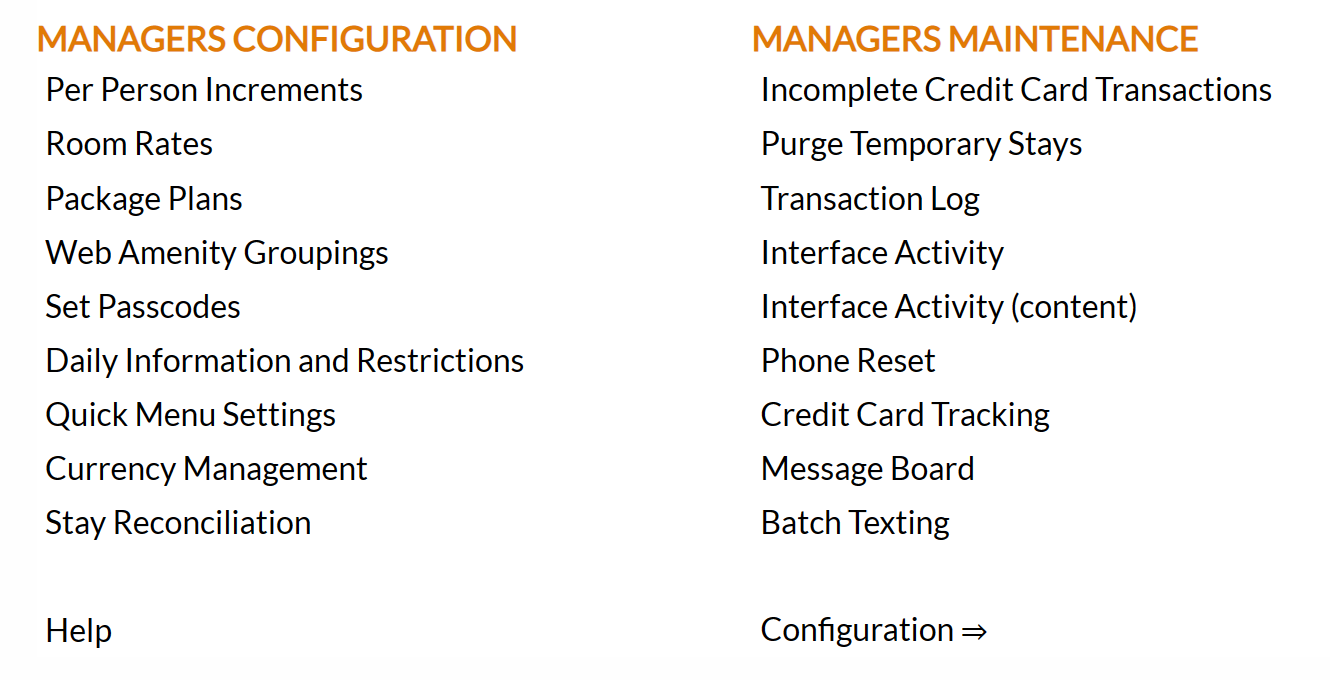
OR:
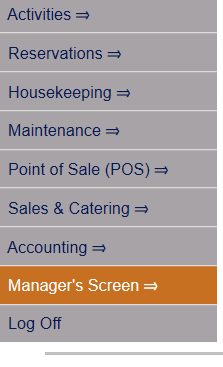
Select Manager's Screen from the Quick Menu on the left side of the screen, to be taken to the Manager's Command screen.
 OR
OR 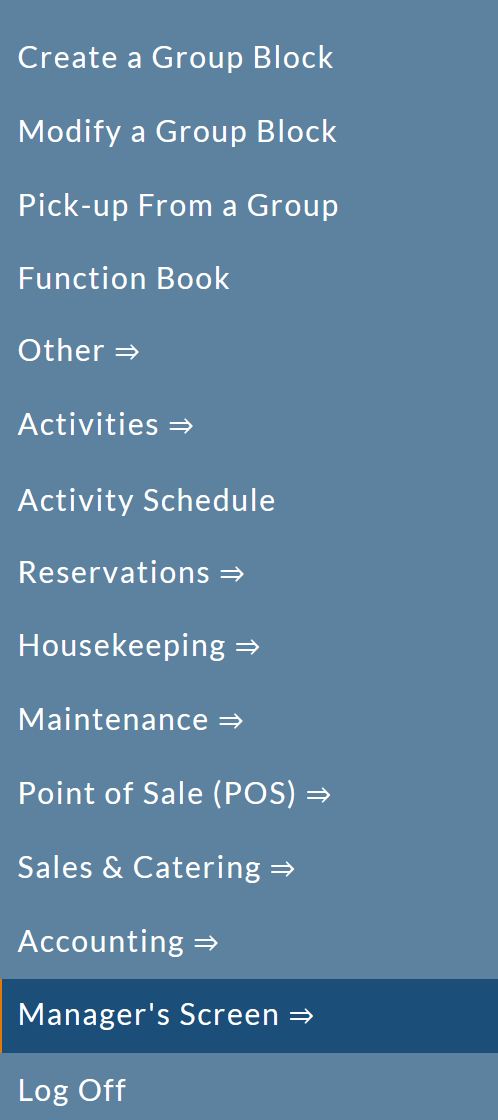
The Manager's Command screen menu has two sections, Manager's Configuration and Manager's Maintenance. Select Configuration => from the Managers Configuration section to be taken to the Property and System Configuration screen. The list of property configuration options are divided into four sections, which are Required Configuration, Optional Configuration, Locales/Dates and Sub-Systems.
 OR
OR 
(Alternately, you may also be able to select Configuration => directly from the Quick Menu, if the menu has been set up to include the Configuration option).
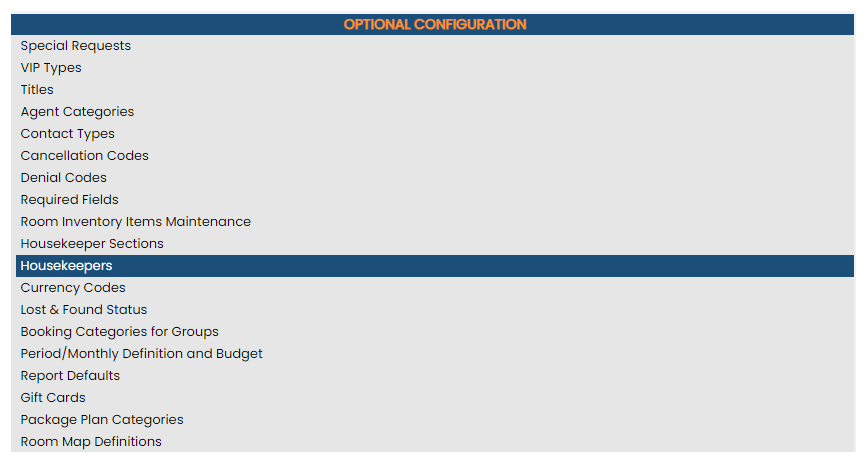
Select Housekeepers from the Optional Configuration section.
 OR
OR 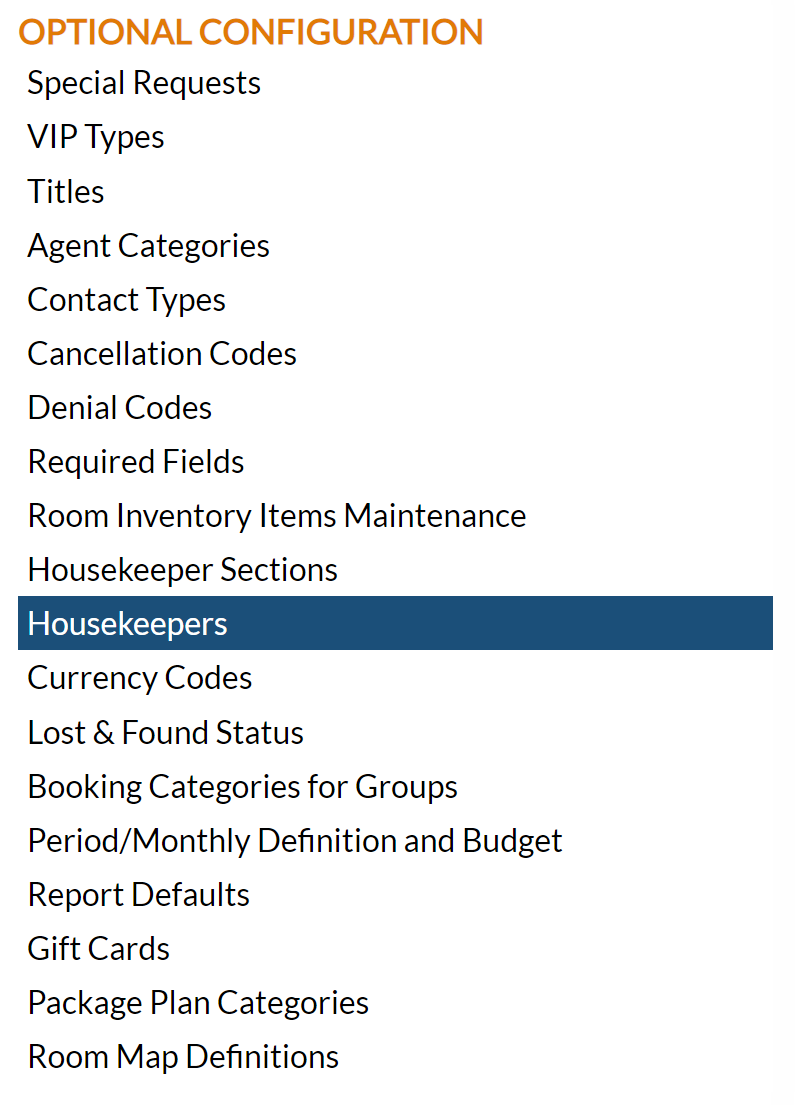
The Housekeepers Maintenance screen display is split into two frames, with the left side of the screen listing any already configured housekeepers for the Property and the right side containing the fields you need to complete in order to add or edit a housekeeper for your Property. Any changes made on the right, once saved, will be updated in the listings to the left.
Note: The Housekeepers screen is a derivative of the Users screen. All housekeepers entered into Skyware will ALSO be viewable on the Users Maintenance screen.

To add a new housekeeper, you will need to generate a new entry. This may be done in one of two ways -
Click the New  button from the toolbar to add a new housekeeper. This will give you a blank entry form on the right, where you will need to complete all the necessary information.
OR:
Select any current housekeeper from the list on the left, and click the Replicate  button from the toolbar. This will give you a copy entry form where all the necessary information is already completed, and you may change the field information specific to the new housekeeper.
There are 2 tabs, "General" and "Multi-Property/Other". Normally, a new housekeeper will not be logging in to the Skyware system, so the Multi-Property/Other tab will not be needed (as this deals with where the User account may access Skyware from). To add a housekeeper, all the information you need to enter is on the on General tab.

Enter:
1. The User ID the housekeeper will use (up to 10 characters long, alphanumeric only)
2. The First Name
3. The Last Name
4. A Quick ID if the housekeeper will be using the Housekeepers Dashboard. (The Quick ID is a code to identify the housekeeper for the housekeepers dashboard, and is NOT the User ID. It may also be up to 10 characters long, and is not case sensitive. This field is optional, but IS required to use the housekeepers dashboard. Each housekeeper using the dashboard must have their own unique Quick ID assigned).
Note: Required fields are shown in red. However, for a new housekeeper, you only need to enter a User ID and the first and last name. The other required fields are used with Skyware User accounts - if the housekeeper is not logging in then the Security Group and Default Menu option choices do not matter and may be left as the automatic default settings. You can if wished generate a Security Group for housekeepers and make it the default for all housekeepers using the Security Group Configuration screen, which has a check box option for this.

Setting a security group as the default option for housekeepers will mean that the security group field on the housekeepers account screen will be automatically defaulted to the designated security group, rather than the security group listed first.
No other information is REQUIRED to enter a new housekeeper, and you may at this point save the information to generate a new housekeeper account.
However, it is RECOMMENDED that you also enter information in the housekeeper portion of the General tab, especially if you wish to be able to assign sections and maximum credits (if you are using the Housekeeping Room Assignments screen) to the new housekeeper.

5. The Hire Date should be completed. Clicking within the field will open the calendar option to allow you to select the correct date of hiring for this housekeeper.
6. The Housekeeper? check box must be checked for the account to be considered a housekeeper account. If you are creating a housekeeper account using the Housekeeper Maintenance screen, by default the check box is both checked and grayed out, meaning that ONLY housekeeper accounts may be generated on this screen. (If you wish to generate a separate User account for your executive housekeeper you will need to use the User maintenance screen to do so).
7. Active Housekeeper: This check box must be checked for the housekeeper to be listed as active (and therefore available/working at your Property). By default, a new housekeeper account is assumed to be for an active account so the check box is checked for you. (Inactive housekeepers cannot be assigned rooms on the Housekeepers Room Assignments screen).
8. If your Property utilizes Housekeeper Sections, you may select a Section for this housekeeper to be associated with from the drop-down list.
9. Maximum Credits when Auto Assigning - (Equivalent to Shift Points) - If your Property is using the shift points method to assign rooms to housekeepers via credits, enter the number of credits to be allocated to this housekeeper. (This may be useful if your Property has a wide range of rooms - the actual amount of work depends on the size of the room and the number of beds, thus a large room with multiple beds may be designated as being worth more credits to clean than a small single room. Using the shift points method means that if the housekeepers are designated a certain number of credits to clean per shift, rather than a certain number of rooms, the workload may be distributed more evenly). By default the value entered in this field is 0. This means NO room credits may be assigned to the housekeeper AUTOMATICALLY. To use the auto assign feature, housekeepers must have a number of credits entered greater than 0.
10. Reset Password: This box may be checked or unchecked. By default for a new housekeeper account it is checked, meaning the first time they log in they will be prompted to enter a password.
11. Password Required: This box may be checked or unchecked. By default it is checked, requiring the housekeeper to supply a password at log in. (For security, Password Required should ALWAYS be checked).
12. Not Active: This box may be checked or unchecked. By default for a new housekeeper account it is unchecked, but in general for a housekeeper this box SHOULD BE CHECKED. Checking this box means the account is entered into the system but the account holder cannot use Skyware - if you do not wish your housekeepers to be able to use Skyware directly this box should be checked.
Note: It is up to the property to decide if housekeepers can interact directly with the Skyware System via a log in and password, or not. For an executive housekeeper, this box may remain unchecked if you do not wish them to have to access Skyware using a separate User account.
When you are finished adding or editing the housekeeper information, click the Save  button. The new housekeeper account will now appear in the list of housekeeper accounts shown on the left side of the screen.
Note: To remove former employees, deselect the "Active Housekeeper" check box for the specific housekeeper (and save the change). This will deactivate the account without deleting it. (Once an account has been created, it cannot be deleted from the system). In the housekeeper list shown on the left side of the screen, the inactive housekeeper will be shown as such in the Active HK column, which lists housekeepers as Yes or No. (Employed/working (active) as Yes, or not (inactive) as No).
